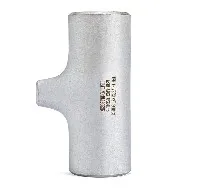
Installing a 45-degree steel elbow on a vertical pipeline is a task that requires precision, the right tools, and a good understanding of the process. As a supplier of high-quality 45-degree steel elbows, I've witnessed firsthand the importance of a proper installation. In this blog, I'll guide you through the step-by-step process of installing a 45-degree steel elbow on a vertical pipeline, ensuring a secure and efficient connection.
Understanding the 45-Degree Steel Elbow
Before we dive into the installation process, it's essential to understand what a 45-degree steel elbow is and its applications. A 45-degree steel elbow is a pipe fitting that changes the direction of a pipeline by 45 degrees. It's commonly used in various industries, including plumbing, HVAC, and industrial piping systems, to navigate around obstacles or to change the flow direction of fluids or gases.
The material of the steel elbow is crucial as it determines its durability and resistance to corrosion. Most 45-degree steel elbows are made from carbon steel, stainless steel, or alloy steel, each with its own unique properties and advantages. For instance, stainless steel elbows are highly resistant to corrosion, making them ideal for applications in harsh environments or where hygiene is a concern.
Tools and Materials Required
To install a 45-degree steel elbow on a vertical pipeline, you'll need the following tools and materials:


- 45-Degree Steel Elbow: Ensure that the elbow is the correct size and material for your pipeline. As a supplier, we offer a wide range of 45-degree steel elbows in different sizes and materials to meet your specific needs.
- Pipe Cutter: A pipe cutter is used to cut the pipeline to the appropriate length. Make sure to choose a pipe cutter that is suitable for the diameter and material of your pipeline.
- Welding Equipment: If you're using a welded connection, you'll need welding equipment, including a welding machine, electrodes, and safety gear such as welding gloves and a welding helmet. You can find more information about Welding stainless steel elbow on our website.
- Pipe Wrenches: Pipe wrenches are used to tighten and secure the elbow to the pipeline. Choose wrenches that are the appropriate size for your pipeline.
- Measuring Tape: A measuring tape is used to measure the length of the pipeline and ensure that the elbow is installed at the correct angle.
- Marker: A marker is used to mark the pipeline where the elbow will be installed.
Step-by-Step Installation Process
Step 1: Prepare the Pipeline
- Measure and Mark: Use a measuring tape to measure the length of the pipeline where the elbow will be installed. Mark the pipeline at the appropriate location using a marker.
- Cut the Pipeline: Use a pipe cutter to cut the pipeline at the marked location. Make sure to cut the pipeline straight and clean to ensure a proper fit with the elbow.
- Deburr the Pipeline: After cutting the pipeline, use a file or deburring tool to remove any burrs or sharp edges from the cut end of the pipeline. This will prevent damage to the elbow and ensure a smooth connection.
Step 2: Prepare the Elbow
- Inspect the Elbow: Before installing the elbow, inspect it for any damage or defects. Make sure that the elbow is the correct size and material for your pipeline.
- Clean the Elbow: Use a wire brush or a cleaning solution to clean the inside and outside of the elbow. This will remove any dirt, debris, or rust that could affect the quality of the connection.
- Mark the Elbow: Use a marker to mark the center of the elbow on both ends. This will help you align the elbow with the pipeline during installation.
Step 3: Align the Elbow
- Position the Elbow: Place the elbow on the cut end of the pipeline, aligning the center marks on the elbow with the center of the pipeline. Make sure that the elbow is at the correct angle (45 degrees) and that it is properly aligned with the pipeline.
- Secure the Elbow: Use pipe wrenches to tighten the elbow to the pipeline. Make sure to tighten the elbow evenly to prevent leaks.
Step 4: Weld the Elbow (if required)
- Prepare the Welding Equipment: If you're using a welded connection, prepare the welding equipment according to the manufacturer's instructions. Make sure to wear appropriate safety gear, including welding gloves and a welding helmet.
- Weld the Elbow: Use the welding equipment to weld the elbow to the pipeline. Make sure to follow the proper welding techniques and procedures to ensure a strong and secure connection. You can find more information about Weld 90 Degree Elbow on our website.
- Inspect the Weld: After welding the elbow, inspect the weld for any defects or cracks. Make sure that the weld is strong and that there are no leaks.
Step 5: Test the Connection
- Pressurize the Pipeline: Once the elbow is installed and welded (if required), pressurize the pipeline to test the connection. Make sure to follow the proper safety procedures when pressurizing the pipeline.
- Check for Leaks: Inspect the connection for any leaks. If you notice any leaks, tighten the elbow or repair the weld as necessary.
Tips for a Successful Installation
- Choose the Right Elbow: Make sure to choose a 45-degree steel elbow that is the correct size and material for your pipeline. Consider the operating conditions, such as pressure, temperature, and fluid or gas type, when selecting the elbow.
- Use the Right Tools: Use the appropriate tools for the installation process. Using the wrong tools can damage the elbow or the pipeline and result in a poor connection.
- Follow the Manufacturer's Instructions: Follow the manufacturer's instructions for the installation of the elbow and the welding equipment. This will ensure a proper and safe installation.
- Inspect the Connection: After installing the elbow, inspect the connection for any defects or leaks. Make sure that the connection is strong and secure before pressurizing the pipeline.
Conclusion
Installing a 45-degree steel elbow on a vertical pipeline is a task that requires precision, the right tools, and a good understanding of the process. By following the steps outlined in this blog and using the tips provided, you can ensure a successful installation and a secure connection. As a supplier of high-quality 45-degree steel elbows, we're committed to providing our customers with the best products and services. If you have any questions or need assistance with your installation, please don't hesitate to contact us. We're here to help you with all your piping needs, including Butt Weld Reducer Tee. Whether you're a professional plumber, an HVAC technician, or a DIY enthusiast, we have the right products and expertise to meet your requirements. Contact us today to discuss your project and explore our range of 45-degree steel elbows and other piping solutions.
References
- Pipe Fitting Handbook
- Welding Handbook
- Plumbing and HVAC Installation Guides