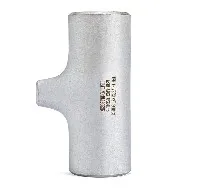
Hey there! As a supplier of Stainless Steel Tees, I've seen firsthand how important it is to get the installation right. In this blog, I'll walk you through the step - by - step process of installing a stainless steel tee. So, let's dive in!
Why Choose Stainless Steel Tees?
Before we get into the installation, let me quickly talk about why stainless steel tees are a great choice. Stainless steel is known for its durability, corrosion resistance, and strength. It can withstand harsh environments, high temperatures, and high pressures. Whether you're working on a plumbing project, a chemical processing plant, or a food and beverage application, Stainless Steel Tee can offer long - lasting performance.


Tools and Materials You'll Need
To install a stainless steel tee, you'll need the following tools and materials:
- Stainless Steel Tee: Of course, you need the right tee for your project. We offer a wide range of Stainless Steel Tee Fittings, including different sizes and configurations to meet your specific needs.
- Stainless Steel Pipes: Make sure the pipes you're using are compatible with the tee in terms of size and material grade.
- Pipe Cutters: To cut the pipes to the appropriate length.
- Deburring Tool: This is used to remove any burrs or sharp edges from the cut pipes.
- Welding Equipment (if applicable): For welded connections, you'll need a welding machine, welding rods, and safety gear such as welding helmets and gloves.
- Pipe Wrenches: To tighten the connections, especially for threaded tees.
- Sealant or Thread Tape (for threaded connections): This helps to create a leak - proof seal.
Step 1: Measure and Cut the Pipes
The first step is to measure the pipes where you want to install the tee. Use a measuring tape to get accurate measurements. Once you have the measurements, use a pipe cutter to cut the pipes. Make sure to cut the pipes as straight as possible. After cutting, use a deburring tool to smooth out the edges of the cut pipes. This will prevent any damage to the seals or the tee itself during installation.
Step 2: Prepare the Tee and Pipes
If you're using a threaded tee, clean the threads on both the tee and the pipes with a wire brush. This will remove any dirt, rust, or debris that could affect the connection. Apply a thin layer of thread tape or sealant to the male threads of the pipes. For welded connections, clean the ends of the pipes and the tee with a stainless steel wire brush to remove any oxidation or contaminants.
Step 3: Connect the Tee to the Pipes
Threaded Connection
If you're using a threaded tee, carefully screw the tee onto one of the pipes. Use a pipe wrench to tighten the connection, but be careful not to over - tighten as this could damage the threads. Then, connect the other pipe to the remaining opening of the tee in the same way. Make sure the tee is aligned properly with the pipes.
Welded Connection
For welded connections, align the tee with the pipes. Clamp the tee and the pipes in place to keep them steady. Set up your welding equipment according to the manufacturer's instructions. Start welding the joints between the tee and the pipes. Make sure to use the correct welding technique and filler material for stainless steel. Weld around the entire circumference of the joint, ensuring a strong and leak - proof connection. After welding, let the joints cool down naturally.
Step 4: Inspect the Installation
Once the tee is connected to the pipes, inspect the installation carefully. Check for any leaks, especially around the connections. For threaded connections, look for any signs of loose threads or seepage. For welded connections, inspect the welds for any cracks or porosity. If you find any issues, make the necessary adjustments or repairs.
Step 5: Pressure Testing
After inspecting the installation, it's a good idea to perform a pressure test. This will help you ensure that the tee and the pipes can withstand the intended pressure. Close all the valves and fill the system with water or the appropriate fluid. Slowly increase the pressure to the recommended level and hold it for a few minutes. Check for any leaks during the pressure test. If there are no leaks, you can gradually release the pressure.
Tips for a Successful Installation
- Choose the Right Size: Make sure the tee and the pipes are the right size for your project. Using the wrong size can lead to leaks or other problems.
- Follow Safety Precautions: When using welding equipment or other tools, always follow the safety guidelines. Wear appropriate safety gear to protect yourself from injuries.
- Cleanliness is Key: Keep the tee and the pipes clean during the installation process. Any dirt or debris can affect the performance of the connection.
Different Types of Stainless Steel Tees
We also offer Stainless Steel Reducer Tee, which are useful when you need to connect pipes of different sizes. These tees have one end that is a different size from the other two, allowing for a smooth transition between different pipe diameters.
Conclusion
Installing a stainless steel tee may seem a bit daunting at first, but if you follow these steps and tips, you'll be able to do it successfully. At our company, we're committed to providing high - quality stainless steel tees and fittings. If you have any questions about our products or need help with installation, don't hesitate to reach out. Whether you're a professional plumber or a DIY enthusiast, we're here to support you. Contact us to discuss your specific requirements and start your next project with confidence.
References
- ASME B16.9 - Factory - Made Wrought Buttwelding Fittings
- ASTM A403 - Standard Specification for Wrought Austenitic Stainless Steel Piping Fittings