Installing a stainless 90 degree elbow is a task that requires careful planning and execution, whether you're working on a small DIY project or a large industrial installation. As a trusted supplier of high - quality stainless 90 degree elbows, I'm here to guide you through the entire installation process.
Understanding the Stainless 90 Degree Elbow
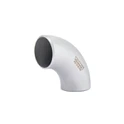
Before we dive into the installation process, it's important to understand what a stainless 90 degree elbow is. A Stainless steel 90 elbow is a pipe fitting that changes the direction of the flow in a piping system by 90 degrees. Made from stainless steel, it offers excellent corrosion resistance, durability, and strength, making it suitable for a wide range of applications, including water supply systems, chemical processing plants, and food and beverage industries.
Tools and Materials Needed
- Measuring Tools: A tape measure and a level are essential for accurate measurements and ensuring that the elbow is installed straight.
- Cutting Tools: Depending on the type of pipe you're working with, you may need a pipe cutter, hacksaw, or a power saw.
- Welding Equipment: If you're using welded elbows, you'll need a welding machine, welding rods, and safety gear such as welding gloves and a welding helmet.
- Sealing Materials: For non - welded connections, you'll need pipe sealant or Teflon tape to prevent leaks.
- Lifting Equipment: In some cases, especially for large - diameter elbows, you may need a hoist or a crane to lift and position the elbow.
Step - by - Step Installation Guide
Step 1: Preparation
- Inspect the Elbow and Pipes: Before installation, carefully inspect the stainless 90 degree elbow and the pipes for any damage, such as cracks, dents, or scratches. Any damaged parts should be replaced to ensure a proper and leak - free connection.
- Measure and Mark: Use a tape measure to determine the exact location where the elbow will be installed. Mark the pipes at the appropriate points to ensure accurate alignment.
Step 2: Cutting the Pipes
- Choose the Right Cutting Method: Select the cutting tool based on the type and thickness of the pipe. For thin - walled pipes, a pipe cutter may be sufficient, while thicker pipes may require a power saw.
- Make Clean Cuts: Ensure that the cuts are straight and clean. After cutting, use a file or sandpaper to remove any burrs or rough edges from the pipe ends.
Step 3: Joining the Elbow and Pipes
There are two common methods for joining a stainless 90 degree elbow to pipes: welding and mechanical connections.


Welded Connections
- Prepare the Welding Area: Clean the pipe ends and the elbow surfaces to be welded. Remove any dirt, grease, or oxidation using a wire brush or a solvent.
- Position the Elbow: Use a level to ensure that the elbow is positioned at a perfect 90 - degree angle. Clamp the elbow in place to prevent movement during welding.
- Weld the Joint: Follow the appropriate welding procedure for stainless steel. Start by tack - welding the joint at several points to hold the elbow and the pipe together. Then, make a continuous weld around the joint, ensuring that the weld is uniform and free of defects.
- Inspect the Weld: After welding, visually inspect the weld for any signs of porosity, cracks, or incomplete fusion. If necessary, perform non - destructive testing such as ultrasonic testing or X - ray inspection.
Mechanical Connections
- Apply Sealant or Tape: If you're using threaded or flanged connections, apply pipe sealant or wrap Teflon tape around the male threads of the pipe or the flange.
- Connect the Elbow: Screw the elbow onto the pipe or bolt the flange - connected elbow to the pipe flange. Tighten the connections evenly to prevent leaks.
Step 4: Testing the Installation
- Pressure Test: Once the elbow is installed, perform a pressure test on the piping system. Slowly increase the pressure to the recommended level and check for any leaks at the joint.
- Visual Inspection: Inspect the entire installation for any signs of misalignment, loose connections, or damage. Make any necessary adjustments or repairs.
Tips for a Successful Installation
- Follow Safety Procedures: Always wear appropriate safety gear, such as safety glasses, gloves, and a hard hat, when working with pipes and tools.
- Use High - Quality Materials: Invest in high - quality stainless 90 degree elbows and pipes to ensure long - term performance and reliability.
- Seek Professional Help if Needed: If you're unsure about any aspect of the installation process, consult a professional plumber or pipe fitter.
Other Related Products
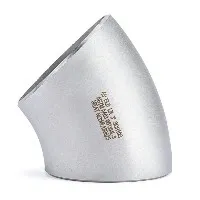
In addition to Stainless steel 90 elbow, we also offer other types of stainless steel pipe elbows, such as Stainless Steel 45 Degree Pipe Elbow and SS 304 Welded Elbows. These products are designed to meet the diverse needs of different piping systems and applications.
Contact for Procurement
If you're interested in purchasing our stainless 90 degree elbows or other related products, we welcome you to reach out for a detailed discussion. Our team of experts is ready to assist you with product selection, technical advice, and pricing information. We are committed to providing high - quality products and excellent customer service to meet your project requirements.
References
- ASME B16.9 - Factory - Made Wrought Steel Buttwelding Fittings
- ASTM A403 - Standard Specification for Wrought Austenitic Stainless Steel Piping Fittings
- AWS D1.6 - Structural Welding Code - Stainless Steel